A shingle roof looks simple from the ground. In practice it’s a layered weather system with flashing, underlayment, ventilation, and the shingles themselves working together to keep water moving the right direction. When something fails, the symptom might be as subtle as a small water stain in a hallway or as obvious as shingles scattered across the lawn after a storm. The question I hear most often is not “what broke,” but “can I fix this myself, or do I need a roofing crew?” The right answer saves money and stress. The wrong one can turn a $250 repair into a $12,000 roof shingle replacement.
I’ve worked on shingle roofing in climates that roast in August and freeze in January. Asphalt composition shingles, architectural or three‑tab, dominate most neighborhoods for good reasons: predictable performance, straightforward roof shingle installation, and manageable costs. That said, they hide water well. Understanding the limits of DIY shingle roof repair versus the moments to call a shingle roofing contractor is less about bravery and more about reading the roof like a map.
What a shingle roof is designed to do
Shingles aren’t a watertight skin. They are overlapping plates that shed water quickly, using gravity and overlap to direct flow down and out. Their granules protect from UV damage, their sealant strips resist wind uplift, and the underlayment beneath offers a secondary barrier. Flashings at penetrations, edges, and valleys handle the places water wants to sneak in. When you see a leak, it almost never starts where the water shows up. It starts higher, or at a seam that moved.
A sound shingle roof has five qualities that you can assess from the ground and with limited, careful access:
- Clean, flat shingle courses with intact granules and unexposed asphalt. Tight, adhered tabs with visible but not gapped butt joints. Straight, fully embedded flashing at chimneys, skylights, walls, and valleys. Good attic ventilation that prevents heat and moisture buildup. Drip edges, gutters, and downspouts that move water away from the fascia and siding.
If two or three of these slip at once, water finds a path.
Safety and scope, before any repair
The first step is deciding if you should be on the roof at all. Height, pitch, and roof age matter. A steep 10/12 with brittle shingles demands professional footing and fall protection. Even a lower 6/12 becomes slick with early morning dew. Asphalt granules act like ball bearings under shoes. I’ve seen homeowners slide six feet on a seemingly dry slope because an adjacent tree dropped pollen that created a micro film.
If you’re unsure, walk the attic instead. A flashlight, a tape measure, and a camera do more good than a shaky ladder. Map the leak inside to a distance up the slope. Count rafters from the eave; each rafter bay is usually 14.5 to 22.5 inches wide, depending on framing. Mark suspect areas on the exterior with painter’s tape, placed from a ladder at the eave, not by climbing above your comfort zone.
DIY shingle roof repair lives in the world of small, isolated damage. Anything that affects structural components, broad areas of shingles, or complex transitions quickly crosses into pro territory.
Common problems you can fix yourself
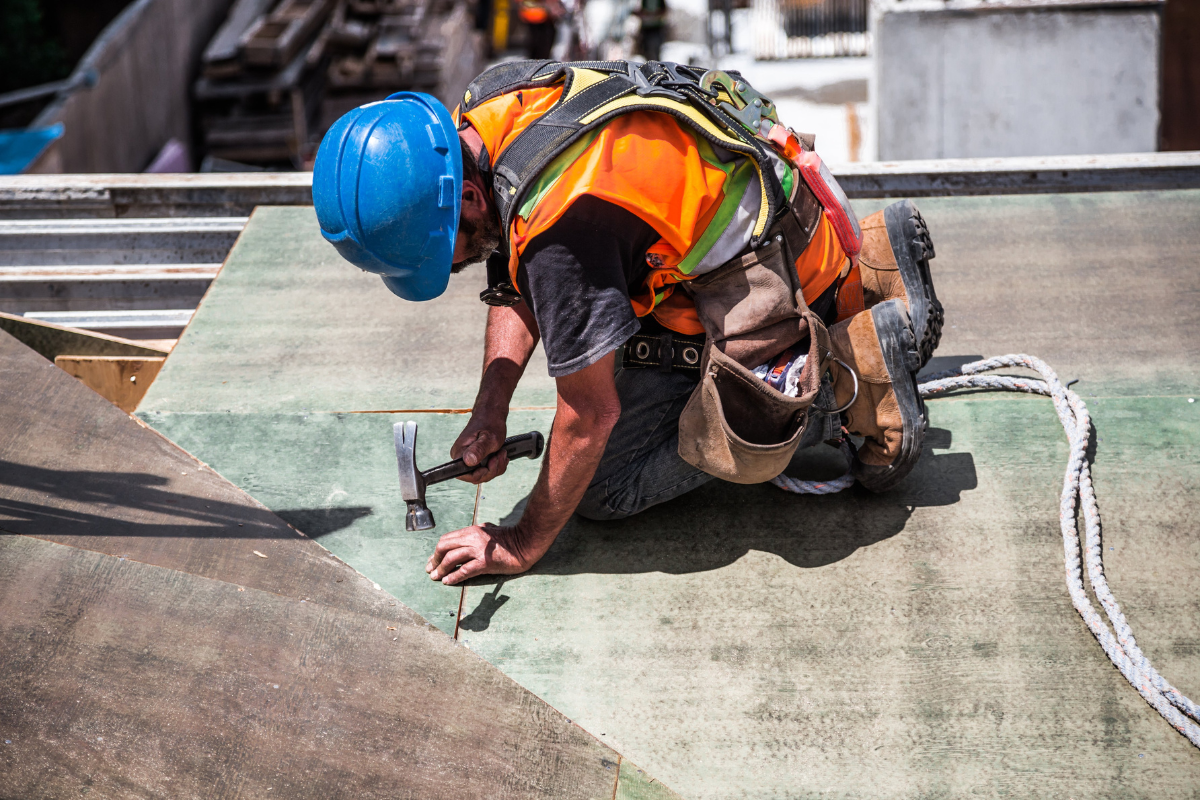
Minor wind uplift, a single cracked tab, or a popped nail can be handled with careful roof shingle repair techniques. If you’re comfortable on a ladder and the pitch is modest, these jobs are within reach, provided you respect the material and the weather.
The best weather for repairs is dry, mild, and with roof surface temperatures between 45 and 85 degrees Fahrenheit. Too cold and shingles crack; too hot and the asphalt softens, footprints embed, and sealant smears.
Here are typical DIY‑friendly issues and how to approach them:
Loose tabs and failed sealant strips. Wind or age can break the bond between courses. Slide a flat pry bar gently under the loose tab to lift it a half inch. If the mat is intact, lay a thin S‑shaped bead of roofing cement near the lower edge under the tab, then press until it seats. Weighted pressure with your gloved palm is enough. Avoid gobs of mastic. Excess attracts granules and can dam water.
Single broken or missing shingles. Remove the roofing nails from the shingle above first, then slide out the damaged piece. Don’t yank. Break the seal carefully with a putty knife so you don’t tear neighboring shingles. Slide the replacement under the upper course, align the exposure, and fasten with properly placed nails, typically four per shingle unless your local code or manufacturer requires six for high‑wind zones. Dab cement on the nail heads you exposed and reseal the lifted tabs.
Nail pops. Seasonal movement can lift a shingle nail, creating a raised spot that catches wind and wicks water. Never pound a popped nail back into the same hole. Pull it, shift an inch higher or lower into solid decking, and drive a new nail. Seal the old hole with a pea‑sized plug of roofing cement under the shingle. If you feel soft wood, stop and reassess. Soft decking signals rot, which is not a DIY afternoon.
Small flashing caulk failures. Around vent pipes and small penetrations, the neoprene boot or caulking lip may separate. If the boot is otherwise flexible and intact, clean the area and apply a compatible high‑quality sealant rated for roofs. If the boot is cracked or brittle, replacing it is still a possible DIY if the slope is mild: loosen shingles around the boot, slide the new flashing in place, integrate it under the upper course and over the lower one, then refasten and seal nail heads. Do not smear sealant as a substitute for proper overlap.
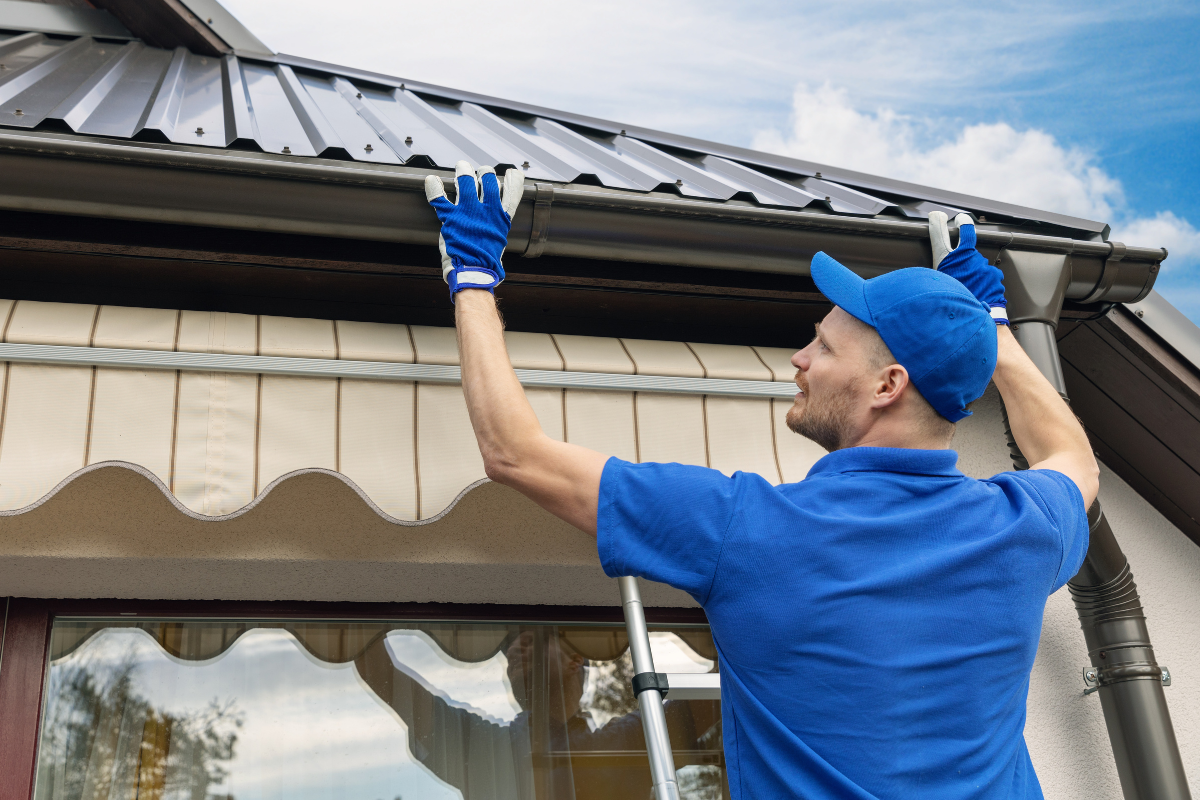
Granule loss at a downspout splash zone. Over time, heavy discharge from an upper gutter onto a lower roof can scour granules, exposing asphalt. The fix is not to paint the shingles. It’s to redirect water with a downspout extension or a splash diverter, then monitor the area. Moderate granule loss alone isn’t a reason for roof shingle replacement, but once the asphalt shines through broadly, the clock is ticking.
Every one of these repairs rewards patience. The penalty for rushing is collateral damage. The secret is heat management and gentle prying. If the sealant won’t release, the roof is too cold, or the shingles are at end of life and will break no matter what you do.
Problems that look small but are not
A brown ceiling ring can be the tip of an iceberg. The most common misread I see is treating complex leaks like simple patch jobs. Water follows the least resistant path, and on a shingle roof the path often involves capillary action along nails, felt edges, and flashing laps.
Here are tricky scenarios that usually justify a pro:
Chimney step flashing with mortar gaps. The visible failure may be the mortar joint, but the deeper issue is often the sequence of flashing pieces under the shingle courses. Proper step flashing alternates shingle and metal, each piece tucked into a reglet or covered by counterflashing. If any step is out of sequence, water rides behind it. Re‑tucking or smearing mastic along the step only hides the symptom. Correct repair means partial deconstruction and correct layering.
Valley leaks. Open and closed valleys both can leak at the transition. If the valley metal is buckled or the shingle cut line is too close to the center and has no bleed notch, replacing valley components requires experience. Valleys are the roof’s river system; mistakes here magnify.
Ice dam damage. In snow climates, ice dams push water uphill under shingles. The fix sometimes involves interior air sealing and insulation along with replacing water‑stained decking edges and installing ice and water shield. It’s not just a shingle problem.
Widespread blistering or cupping shingles. Heat and ventilation issues create systemic shingle failure. Swapping a few shingles won’t address the cause. An attic that holds 120 to 140 degrees in summer or carries winter condensation will shorten shingle life dramatically. This is a roof‑attic system issue, not a patch.
Hail strikes with bruised mats. You may see only pockmarks. The real damage is granule displacement and micro fractures in the asphalt mat. These become leaks seasons later. A trained eye, often paired with an insurance adjuster, should evaluate. Documentingsize and density of strikes, number of hits in a test square, and slope orientation matters.
The cost calculus: repair, partial replacement, or full tear‑off
The dollar question is where to draw the line between shingle roof repair and roof shingle replacement. I use a combination of age, damage extent, and deck integrity.
Age. Most architectural asphalt shingles carry a stated lifespan of 25 to 30 years, with three‑tab products often rated 20 to 25. Real‑world service varies with climate and ventilation. If the roof is over 70 to 80 percent of its expected life and you’re seeing multiple leaks or widespread granule loss, targeted repairs may only buy a year or two.
Damage extent. Rule of thumb: if more than 15 to 20 percent of a plane needs shingles replaced due to wind or hail, a full plane replacement becomes more sensible. Blending new and aged shingles is also an aesthetic problem, especially on street‑facing slopes.
Deck condition. Soft spots underfoot, delamination, or visible rot at eaves and valleys indicate a bigger job. You cannot fasten shingles reliably to compromised decking. Doing so invites uplift and continued leaks.
Budget realities matter too. It’s not uncommon for a homeowner to request “just stop the leak” before winter. A competent shingle roofing contractor can stage repairs to stabilize the home, then plan for a spring tear‑off. The key is honesty about the temporary nature of that approach.
What pros bring that DIY cannot
Beyond safety gear and speed, professional crews bring sequencing discipline and manufacturer compliance. Many warranties require specific nail counts, placement within the nailing zone, and underlayment choices. I’ve replaced roofs where a homeowner’s well‑meaning patches voided coverage because incompatible sealants reacted with the shingle asphalt, breaking down granules. Pros also carry the right flashings and know when to bend custom pieces on site rather than forcing stock parts to fit.
Moisture diagnostics distinguish an experienced crew. A pro will pull a few strategic shingles to examine fastener patterns, check for nail pull‑through, probe decking with an awl for rot, and trace water marks along underlayment laps. Thermography and moisture meters can help, but the craft comes from reading stains and flow. That matters when you want a roof shingle installation to last the way the brochure promises.
A practical field checklist for deciding DIY vs pro
Use this quick filter at the ladder foot. If any “no” appears, lean toward calling in a contractor.
- Can you reach the repair area from a stable ladder or with minimal roof walking on a low to moderate pitch, in dry conditions? Is the damage isolated to a handful of shingles or a single, simple flashing, with no sign of widespread granule loss or soft decking? Do you have matching or compatible shingles, correct nails, a flat pry bar, and a roofing‑rated sealant, and do you know where to place nails without cutting into a valley or flashing? Is the roof under 15 years old with a generally healthy surface, and is the attic dry without musty odor or visible mold on the sheathing? Can you complete the repair in a single weather window without leaving any opened overlaps overnight?
If you hesitate on any point, there’s no shame in scheduling a shingle roofing contractor. The difference between a neat, invisible repair and a call‑back leak usually lives in details you only learn after climbing a few hundred roofs.
Anatomy of a clean shingle patch
Homeowners who want to tackle a single missing shingle often ask for a step‑by‑step. The process matters because it teaches respect for the overlap system. Here’s the short version that keeps you out of trouble:
- Warm the area. Work in mid‑morning sun or shade after the surface temp stabilizes. Cold shingles crack. Hot shingles smear. Break the seal gently. Use a putty knife to lift the adhesive strip above your target shingle. Then ease a flat bar under the shingle to pop the nails from the course above. Remove nails without tearing surrounding material. Slide the damaged shingle out and fit the new one. Align the exposure with neighboring courses. Place nails in the manufacturer’s nailing zone, avoiding seams and any flashing lines. Reseal lifted tabs with a modest bead of roofing cement. Press to seat. Wipe excess. Ensure the tab edges lay flat so wind doesn’t grab them. Inspect your work from the ground. Look for lifted edges or slight humps which signal stray nails or debris under a shingle.
If what you find deviates from this script, stop. Hidden flashings, soft deck, or an uncooperative overlap means the job is more complicated than a patch.
Ventilation and attic health, the silent partners
Many shingle issues trace back to attic conditions. A well‑vented roof stays cooler and dries out faster after wind‑driven rain. Balanced intake at the eaves and exhaust at the ridge protects the sheathing and prevents the shingle asphalt from baking. I’ve pulled off roofs at 12 years old that looked 25, only to find blocked soffit vents and a thick layer of dust clogging baffles. Correcting airflow slowed future aging more than any sealant or coating could.
Watch for frost on nails in winter, musty odors, or damp insulation. These signs point to air leaks from the living space into the attic. Sealing top plates, bath fan ducts, and recessed lights does more for the roof’s life than another layer of shingles. It’s not glamorous work, but it’s what makes roof shingle replacement pay off.
Matching shingles and the realities of color and code
When you replace a few shingles, color matching is part art, part luck. Even the same brand and model may not match after a few seasons in the sun. If curb appeal is important, pull replacements from the least visible roof plane so the mismatch lives in one area. Alternatively, ask suppliers about “drop” bundles that came from the same production run as your existing roof, though the odds are slim unless the install was recent.
Code compliance matters more than color. In high‑wind regions, local amendments often require six nails per shingle, enhanced starter courses, and specific underlayment types. If you’re in a coastal county or a hail‑prone belt, check the manufacturer’s high‑wind or impact‑rated installation bulletins. A small repair that ignores these details can be the weak link in the next storm.
Insurance, storms, and the claims dance
After a hail or wind event, neighborhoods fill with yard signs and door knockers. Some are excellent shingle roofing contractors. Some are temporary crews chasing storms. If you suspect storm damage, document first. Take clear photos of slopes, downspouts, and soft metals like window wraps and mailbox tops that show impact marks. Call your insurer to understand deductibles and claim timelines, then bring in a reputable local contractor with manufacturer certifications. A good contractor will mark off test squares, count hits, and make a case for repair or replacement grounded in the carrier’s criteria.
Beware of anyone who promises a free roof regardless of findings or asks you to sign an assignment of benefits. Keep control of the claim and the contract. Make sure the scope includes code upgrades that your jurisdiction requires, such as drip edge or ice barrier, so you’re not out of pocket for compliance items.
Choosing the right shingle roofing contractor
Credentials matter, but references and details matter more. You want a contractor who talks about flashing before shingle style, who explains nail placement and underlayment choices without jargon, and who gives a schedule that accounts for weather. Ask to see a recent job in your neighborhood and request the crew lead’s name. Good companies have stable teams.
For roof shingle installation, look for manufacturer’s preferred or certified status. This often extends material and labor warranties, but only if the crew follows the documented system. If you’re evaluating a bid for shingle roof repair, clarity helps: scope line items that say “replace step flashing at right chimney” instead of “repair chimney,” photos before and after, and a warranty period that matches the work. A one‑year leak warranty on a defined repair is reasonable. Lifetime warranties on patches are marketing, not reality.
When replacement is the smarter spend
There are moments where continuing to patch is false economy. You reach that point when multiple slopes exhibit age symptoms, when decking shows recurring rot at eaves, or when leaks recur along different details because the underlying roof plane is tired. If repairs in the last two years add up to 10 to 20 percent of a new roof cost, regroup. A well‑planned roof shingle replacement not only stops current leaks but also resets flashing details to modern standards, improves ventilation, and can reduce attic temperatures by 10 to 20 degrees in summer.
When you do replace, think in systems. Starter strips, proper ridge caps, continuous ridge venting, ice barrier in vulnerable zones, and prefinished metal flashings integrated into siding or masonry, not just surface‑caulked. That’s the difference between a quiet roof for the next two decades and a slow dripper that keeps you on a first‑name basis with a repair tech.
The seasonal rhythm of maintenance
A shingle roof appreciates small, regular attention. A spring and fall routine keeps surprises at bay. After heavy storms, walk the perimeter and look at slopes with binoculars. Check for lifted tabs, missing shingles, and debris in valleys. Clean gutters. From the attic, look after the first hard rain for new stains or musty smells. Small chores caught early are exactly where DIY shines. Ignore them, and you’ll be pricing out scaffolding.
When you do climb, treat the roof like a finished floor, not a job site. Soft‑soled shoes, careful footing across courses rather than perpendicular to them, and minimal tool bags. Every unnecessary step shortens shingle life slightly. Respect the surface, and it will pay you back.
Putting it all together
Deciding between DIY shingle roof repair and calling a pro is about reading conditions, respecting safety, and knowing where the shingle system stops and flashing physics starts. If the issue is isolated, the deck is sound, and you can work within the material’s limits, a homeowner can execute a clean, durable repair. If the problem touches valleys, chimneys, multiple slopes, or an aging field of shingles, a seasoned shingle roofing contractor earns their keep. The best outcome is a dry https://josuekbau022.yousher.com/shingle-roof-repair-when-to-diy-and-when-to-call-a-pro house and a roof that looks untouched, even when you know what went into it.
A roof doesn’t demand perfection. It demands correct sequence, clean laps, and a path for water. Keep that in mind as you weigh your options. Spend your energy where it prevents future headaches: safe access, careful diagnosis, and work that respects how the roof sheds water. Everything else follows.
Express Roofing Supply
Address: 1790 SW 30th Ave, Hallandale Beach, FL 33009
Phone: (954) 477-7703
Website: https://www.expressroofsupply.com/
FAQ About Roof Repair
How much should it cost to repair a roof? Minor repairs (sealant, a few shingles, small flashing fixes) typically run $150–$600, moderate repairs (leaks, larger flashing/vent issues) are often $400–$1,500, and extensive repairs (structural or widespread damage) can be $1,500–$5,000+; actual pricing varies by material, roof pitch, access, and local labor rates.
How much does it roughly cost to fix a roof? As a rough rule of thumb, plan around $3–$12 per square foot for common repairs, with asphalt generally at the lower end and tile/metal at the higher end; expect trip minimums and emergency fees to increase the total.
What is the most common roof repair? Replacing damaged or missing shingles/tiles and fixing flashing around chimneys, skylights, and vents are the most common repairs, since these areas are frequent sources of leaks.
Can you repair a roof without replacing it? Yes—if the damage is localized and the underlying decking and structure are sound, targeted repairs (patching, flashing replacement, shingle swaps) can restore performance without a full replacement.
Can you repair just a section of a roof? Yes—partial repairs or “sectional” reroofs are common for isolated damage; ensure materials match (age, color, profile) and that transitions are properly flashed to avoid future leaks.
Can a handyman do roof repairs? A handyman can handle small, simple fixes, but for leak diagnosis, flashing work, structural issues, or warranty-covered roofs, it’s safer to hire a licensed roofing contractor for proper materials, safety, and documentation.
Does homeowners insurance cover roof repair? Usually only for sudden, accidental damage (e.g., wind, hail, falling tree limbs) and not for wear-and-tear or neglect; coverage specifics, deductibles, and documentation requirements vary by policy—check your insurer before starting work.
What is the best time of year for roof repair? Dry, mild weather is ideal—often late spring through early fall; in warmer climates, schedule repairs for the dry season and avoid periods with heavy rain, high winds, or freezing temperatures for best adhesion and safety.