Myth thrives when work happens out of sight. Roofing is a perfect example. Most homeowners only see the dumpster arrive and the new shingle color at the end. The messy choices that define a roof’s lifespan hide under the surface: vent math, fastener patterns, deck prep, and weather timing. After two decades around tear-offs, inspections, and callbacks, I’ve learned that the most expensive problems usually begin with confident half-truths. Let’s clear those up so you can make better decisions about shingle roof projects, whether you’re planning a roof shingle installation, a targeted roof shingle repair, or a full roof shingle replacement.
Myth 1: “Shingles are waterproof, so the underlayment doesn’t matter”
Asphalt shingles shed water beautifully when they’re layered on a flat, properly ventilated plane. They are not watertight on their own. Wind-driven rain and ice can push water uphill, which is why underlayment works as your secondary drainage plane. Skimping here is a classic budget mistake, and it doesn’t show up until the first sideways storm.
I’ve opened roofs where the shingles looked decent, yet the deck was black and spongy. The culprit was a torn or paper-thin underlayment, poorly overlapped. In cold regions, Ice and Water Shield at eaves and in valleys is not optional. In hot-sun markets, high-temp synthetic underlayment helps prevent adhesive bleed and wrinkling under dark shingle colors. Even in mild climates, a consistent underlayment layer protects against capillary wicking at nail penetrations and buys you time if a shingle lifts.
Think of shingles as armor plates and underlayment as the chain mail underneath. Alone, neither wins the battle. Together, they do.
Myth 2: “More nails means a stronger shingle roof”
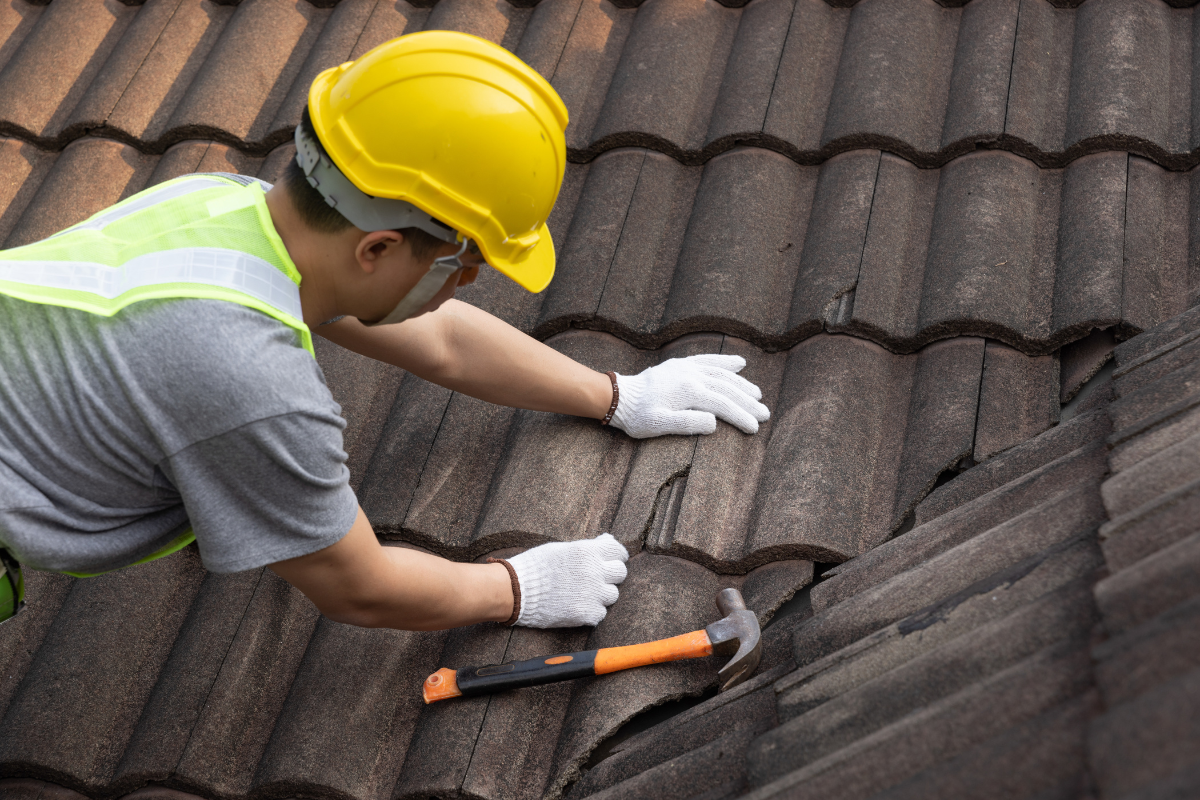
Fastener count matters, but not in the way homeowners think. Manufacturers specify a nail count and a nail placement for a reason. On most laminated architectural shingles, four nails is standard, six nails for high-wind zones. Putting eight nails wherever the installer feels like it doesn’t improve wind rating if the nails miss the “bond line,” that narrow area designed to lock courses together.
I’ve inspected roofs after tropical storms where shingles ripped like playing cards because nails sat high. The installer used enough nails, but drove them above the nailing strip. Drive nails too high, the shingle below never gets pinned; drive too low, you puncture the exposure and invite leaks. Too deep, and the nail cuts the mat. Too shallow, and the head rides the shingle, ready to pop in a freeze-thaw cycle.
Use the right nails, too. Electro-galvanized roofing nails can rust early in coastal humidity. Hot-dipped galvanized or stainless, depending on distance from saltwater, keeps the fastener intact as long as the shingle. Staples still show up on old roofs; many codes restrict or forbid them for good reasons. Follow the manufacturer’s nailing pattern and depth, not just nail count, and your shingle roofing will perform like the brochure claims.
Myth 3: “All architectural shingles are the same, so buy the cheapest”
Architectural shingles vary in asphalt content, mat weight, and proprietary sealants. Heavier usually means more asphalt, which resists thermal cracking and holds granules longer. But weight isn’t everything. Some premium shingles use polymer-modified asphalt for better flexibility at low temperatures or improved stick in dusty environments. Others vary the shape and granule mix to improve shadow lines.
Where you live matters. High UV regions chew through lighter shingles faster, especially in darker colors. Cold climates reward flexible mats that resist brittleness during winter installation. If your home faces constant western exposure or stands in a wind corridor, a shingle line with a real, tested high-wind rating saves grief.
A good shingle roofing contractor will bring samples and data sheets. Ask for the product’s exposure width, nailing zone design, and certified wind rating with the required nail count. Two shingles can share a style name and warranty length, yet behave very differently on a south-facing hip roof.
Myth 4: “New shingles will fix leaks without addressing the deck”
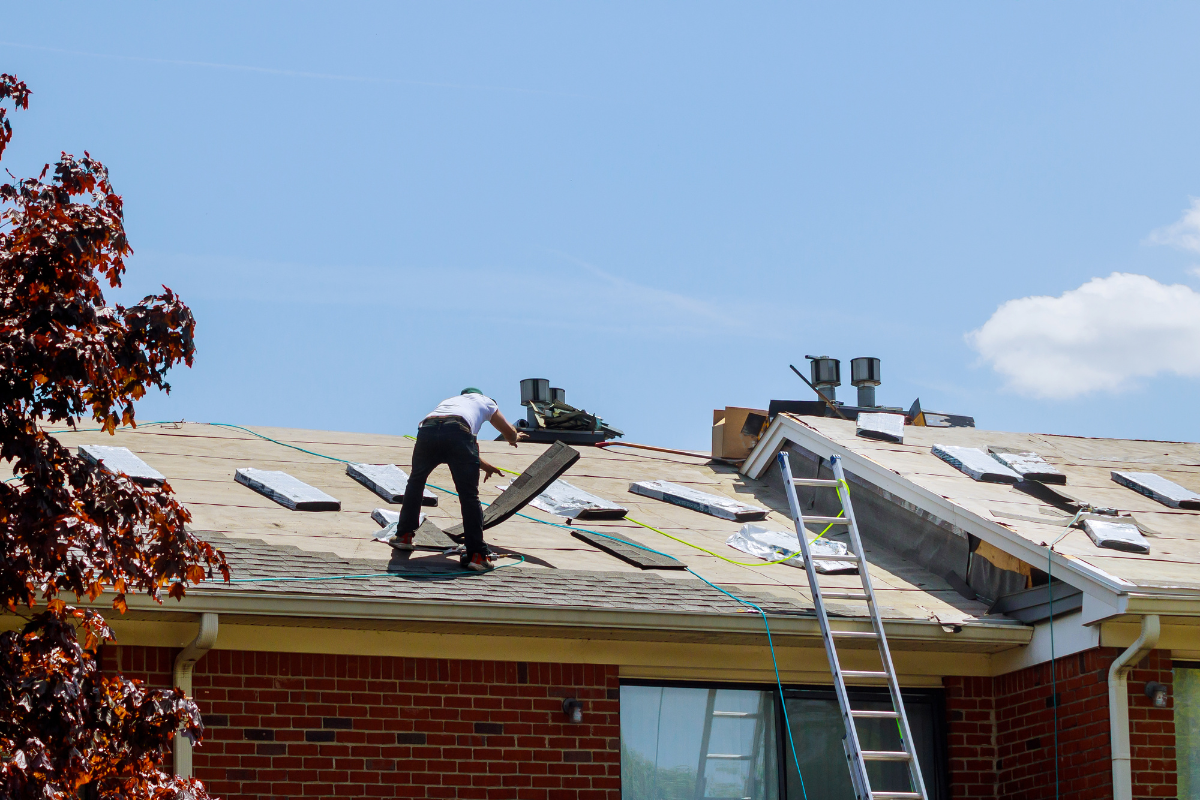
It’s tempting to overlay new shingles over old or to ignore a suspect deck to keep costs down. I’ve seen pilots of overlay projects go fine for a few years, then fail suddenly, and the tear-off becomes expensive because two layers trap moisture. Shingles don’t create structure. If the plywood is delaminated or the plank deck has gaps wider than a finger, the nails won’t hold properly and the shingle surface will ripple.
Soft spots around penetrations rarely fix themselves. Bathroom fan vents and chimneys are notorious for slow leaks that rot the surrounding deck. A proper roof shingle replacement includes a walk-over inspection after tear-off, probing with a flat bar and replacing any punky decking. On plank decks, inserting plywood over gaps or replacing boards reduces nail blow-through. The best time to fix a deck is when it is fully exposed and dry, not after you see a ceiling stain.
Myth 5: “It doesn’t matter how warm or cold it is when installing”
Temperature and humidity change everything. Install in extreme cold, and shingles may not lay flat or seal to each other, leaving the roof vulnerable to wind until warmer days. Install under blazing sun, and you can scuff granules with your knees or overdrive nails in softened mats. Adhesive strips behave differently across a 40 to 90 degree window, and shaded areas lag behind sunny slopes.
In cold snaps, we hand-seal tabs with roofing cement on vulnerable edges, ridges, and perimeters. In heat, we stage bundles in the shade, keep compressors at correct pressure, and periodically check nail depth. Afternoon thunderstorms in humid climates challenge underlayment; if the deck gets wet, let it dry before covering to avoid trapped moisture. Good scheduling and patience beat rushing a job into the wrong weather window.
Myth 6: “Ventilation is optional if you use a quality shingle”
Ventilation protects shingles from the underside. Without it, attic temperatures soar, asphalt ages faster, and winter moisture condenses under the deck. I have peeled back fascia and found mold stripes exactly where insulation stuffed the soffits. The shingles were only five years old and already curling.
A balanced system feeds air at the soffits and exhausts at the ridge or gables. Aim for intake and exhaust areas that match, not just a token ridge vent added at the end. Too much exhaust with blocked soffits pulls conditioned air from the house without cooling the deck. A shingle roof relies on convective airflow to keep the deck dry and the shingle temperature down. When planning a roof shingle installation, check that baffles keep insulation out of soffits and that older bath and kitchen fans vent outside, not into the attic.
Myth 7: “Drip edge is cosmetic, not critical”
The drip edge creates a clean line, but its real job is to guide water away from the fascia and direct it into the gutters. Without it, capillary action pulls water backward under shingles and into the deck edge. You may not notice the damage until the plywood crumbles during a future tear-off.
On eaves, the drip edge goes under the underlayment when using Ice and Water Shield on top, or under certain synthetics depending on local code and manufacturer guidance. On rakes, it typically goes over the underlayment. These small sequencing details matter. Get them wrong and water paths reverse.
Myth 8: “Roofing cement fixes anything”
Cement is a patch, not a roof. I’ve seen troweled globs around vent stacks, smeared right over crackling rubber boots, and smeared into valleys like frosting. It buys time on a dry day, then splits with UV and heat. For long-term roof shingle repair, replace the failing boot, rework the step flashing, or reset the counterflashing in mortar. Cement belongs as a dab under lifted tabs or as a helper around certain detail work, not as a universal cure.
When you must patch, clean the surface, let it dry, and apply cement sparingly under the shingle, not over it. The best repairs disappear into the system and keep the drainage plane intact.
Myth 9: “Manufacturer warranties cover everything”
Read the fine print. Most shingle warranties cover manufacturing defects, not poor installation or inadequate ventilation. Many enhanced warranties that extend coverage must be registered, use approved accessory products, and be installed by a certified shingle roofing contractor. Skip any of those steps and the impressive years on the brochure shrink to a basic limited term.
Documentation helps. Keep your contract, proof of product type, and photos. If a storm hits, file an insurance claim for storm damage, not a warranty claim for premature wear. Those are different pathways with different standards.
Myth 10: “Valleys and flashings are minor details”
Valleys move the most water on the roof. They deserve careful layout and nails kept at the correct distance from the centerline. Open metal valleys shed debris well, while closed-cut shingle valleys look cleaner. Choose based on your roof pitch, tree litter, and regional norms. Both work when installed correctly; both leak when nails stray into the flow path.
Flashing around walls and chimneys needs step flashing pieces layered with each course of shingles, not a single pan or a smear of cement. Counterflashing should land in a reglet or be properly surface-mounted with sealant rated for UV and the wall material. I’ve replaced perfect shingles around a chimney because a single missing step flashing allowed water to ride under four courses before it found the living room ceiling.
Myth 11: “You can’t install shingles over a low slope”
Standard shingles require a minimum slope. Most manufacturers specify at least 2:12 with special underlayment methods, and many insist on 4:12 for standard practice. Try laying shingles flat and they act like siding in a rainstorm. Water finds every overlap.
For low-slope sections, switch to a membrane or a self-adhered system designed for that pitch. On transition roofs where a porch ties into the main roof at a shallower angle, blend systems so water flows from the shingle roofing into the low-slope material without a speed bump. Done right, the mix looks intentional and stays dry.
Myth 12: “Color only affects curb appeal”
Color influences performance. Dark shingles absorb more heat, raising deck temperature, which can accelerate aging in hot, sunny climates. Light colors reflect more, sometimes measurable in attic temperatures by 5 to 10 degrees on peak days. That said, modern cool-color granules complicate the old dark-bad, light-good rule. Some mid-tone “cool” shingles reflect enough IR to keep attic temps manageable.
Color also hides or highlights debris and aging. Lighter grays show less heat blistering but more algae streaks unless you choose algae-resistant granules. In tree-heavy lots, consider shingles with copper-infused granules that resist streaking. On a complex roof with many hips and ridges, a color with distinct shadow lines adds depth and masks tiny plane deviations left by an imperfect deck.
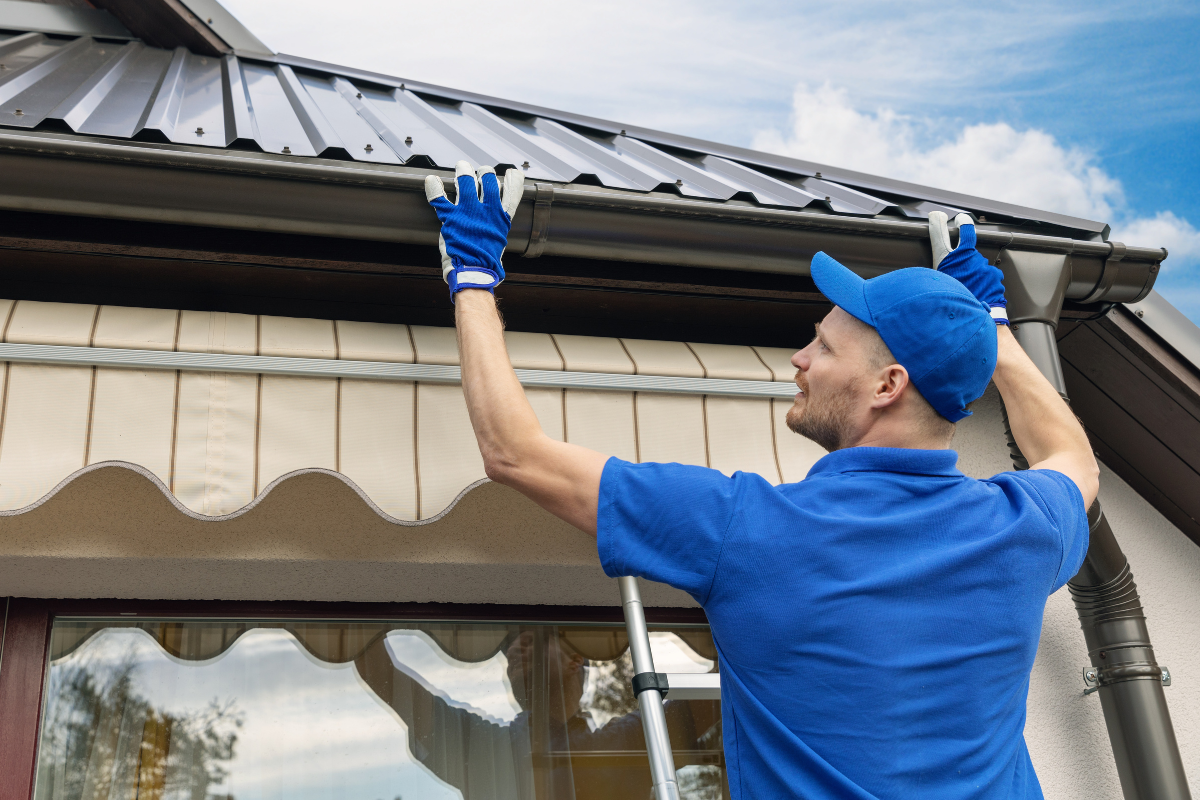
Myth 13: “Gutters and roofs are separate systems”
They meet at the drip edge. If gutters sit too high, they can tuck under shingles and wick water backward. If they sit too low, water overshoots. When we do a roof shingle replacement, we check the gutter hangers, spacing, and pitch. If you replace the gutters later, use hidden hangers that don’t punch through the fresh drip edge or the first course of shingles.
Downspouts that dump onto lower roofs wear divots in shingles, especially on shallow slopes. Kick those downspouts into a leader or a scupper that bypasses the shingle surface, particularly in freeze-prone areas where ice slabs form.
Myth 14: “A repair is always cheaper than replacement”
Targeted roof shingle repair makes sense when damage is isolated, the surrounding shingles are young, and the deck is sound. If the roof is past two-thirds of its expected life, repairs become band-aids that cost more per year of useful life than a planned replacement. I once replaced five blown-off shingles on a fifteen-year-old roof. Two months later, different tabs lifted. The owner paid for multiple visits before deciding on a full tear-off that also fixed the brittle underlayment and failing vents.
The better metric is cost per remaining year. If a $600 repair buys a year or two on a roof with widespread granule loss and curling, a $12,000 replacement that resets the clock https://charlieqvij838.timeforchangecounselling.com/a-step-by-step-roof-shingle-replacement-checklist to 25 to 30 years looks smarter.
Myth 15: “Any contractor who can swing a hammer can do roofing”
Roofing rewards repetition and detail. Layout decisions on the first hour set patterns that keep lines straight and courses square. Experienced crews catch subtle sags in old framing and shim accordingly. They flash oddball corners, integrate skylight kits correctly, and bring the right nails and caps for your specific shingle and underlayment.
A reliable shingle roofing contractor will explain their plan for ventilation, show you the exact shingle line, fastener type, underlayment brand, and flashing metal, and put the sequence in writing. They should welcome questions about nailing zones, valley method, and edge metal. If the answers are vague, keep looking.
Myth 16: “Tear-off debris is just a mess to haul away”
What you see in the dumpster tells you about the roof you just lost. Excess granules suggest UV wear or a bad run of shingles. Rusty nails hint at poor fastener selection. Shredded felt glued to the deck tells you heat welded the old underlayment down, a sign that ventilation was weak. On projects I manage, we take five minutes to read the debris. It often leads to small adjustments that extend the life of the new roof, like upgrading intake vents or choosing a different underlayment.
Myth 17: “Ice dams mean the roof or shingles are defective”
Ice dams usually trace back to attic heat escaping and melting the snow blanket. The meltwater refreezes at the cold eaves, forming a dam that backs water under shingles. Ice and Water Shield helps, but it’s a seatbelt, not a fix. Improving insulation continuity, sealing attic bypasses around lights and chases, and ensuring strong soffit-to-ridge airflow make a bigger difference than swapping shingle brands.
On older homes, I’ve added baffles in every bay and trimmed back overstuffed insulation blocking soffits. After that, the same roof rode out the next winter without interior stains. The shingles didn’t change; the building science did.
Myth 18: “A straight roofline means perfect framing”
Sight lines can lie. A roof can look straight from the driveway yet hide a shallow dish or a hump from an old ridge sag or mismatched rafter heights. Those areas telegraph through shingles as slight puddling or shadow changes. Shimming, adding new plywood over plank decking, and careful course layout can reduce the visual noise.
Expect a conversation about what “perfect” looks like. A few minor ripples on a 70-year-old farmhouse are normal. On a new build or a high-end renovation, spending a day truing the deck pays dividends in aesthetics and performance. Communicate your expectations before the first bundle is opened.
Myth 19: “As long as it doesn’t leak, it’s fine”
Water entry is the final failure stage, not the first. Granule loss, exposed fiberglass, curled tabs, lifted nail heads, and cracked sealant lines all point to a system aging out. Waiting for a leak invites collateral damage: wet insulation, stained drywall, or mold blooms. A seasonal walk-around and binocular check catch issues while they’re cheap.
At the five to ten year mark, plan for a maintenance tune-up: re-caulk flashing laps where appropriate, replace a handful of aging pipe boots, reset any loose ridge caps, and clear debris from valleys. Half a day of preventive work can add years to the service life.
Myth 20: “All permits and codes are just red tape”
Codes are written in roofers’ blood and homeowners’ wallets. They reflect failure patterns: high-wind nailing patterns, ice barrier distances past the warm wall, and ventilation minimums. Skipping a permit can bite you at resale or insurance claim time. I’ve seen insurers deny wind-damage claims when the roof lacked documentation of compliant installation.
Local amendments matter. Coastal zones often require specific corrosion-resistant fasteners and high-wind shingle ratings. Mountain towns may extend ice barrier up-slope. A reputable contractor knows the local inspector by name and welcomes the inspection. Passing isn’t a nuisance; it’s free quality control.
A practical way to approach your project
- Ask your shingle roofing contractor to specify, in writing, the shingle model, underlayment type, nail type and count, valley method, drip edge gauge, and ventilation plan. Request photos of decking during tear-off and any replacements. Confirm scheduling around weather. If cold, ask about hand-sealing; if hot, ask about nail depth checks. Verify Ice and Water Shield where required. Inspect intake and exhaust ventilation balance. Ensure soffits are clear and baffles installed. Redirect bath fans to the exterior if needed.
When repair beats replacement, and when it doesn’t
Repairs shine when wind tears a few tabs on a relatively young roof or when a single boot fails around a vent. You match shingle color as closely as possible, rework the flashing, and the problem disappears. Where it fails is on brittle, near-end-of-life shingles. Disturbing them to fix one area can break adjacent tabs, and your roof shingle repair turns into a patchwork.
A full roof shingle replacement makes sense when you see widespread granule loss, multiple leaks, curled edges, or soft decking. Plan it before an emergency forces rushed decisions. You’ll get better scheduling, more options on materials, and time to discuss details that separate a 12-year roof from a 25-year performer.
Choosing the right partner and watching the right details
The difference between a decent job and a great one hides in small decisions. I look for crews that chalk straight reference lines and re-chalk as they go. I watch for nail placement, not just speed. I see whether they open and inspect every valley and penetration rather than floating new work over old sins. I listen for the air hose pressure check when the compressor starts. These habits predict how your roof will behave in its first storm and in year fifteen.
If you’re interviewing contractors, ask to see a recent job with similar roof complexity. Stand back from the street and check for line wobbles. Look at the valleys from a ladder, safely, and see how the cuts align. Ask how they handled ventilation on that project. A seasoned pro will be proud to show the work and walk you through the choices.
A brief note on cost, value, and timing
Markets vary, but the big buckets are labor, shingles, underlayment, flashing metals, and disposal. Upgrading underlayment in critical areas and using stainless or hot-dipped fasteners near salt air add modest cost and major durability. Cutting corners often saves single-digit percentages up front and costs double in callbacks or early wear. If your roof is flirting with end-of-life, book the work outside storm season when schedules are less chaotic, materials are readily available, and crews are less rushed.
Bringing it all together
A shingle roof looks simple from the sidewalk. It’s a layered system that depends on precision, sequencing, and respect for water. The myths that persist do so because they contain a sliver of truth, then skip the details that make the system work. If you remember nothing else, remember this: water follows physics, shingles need partners, and small decisions add up. Choose materials suited to your climate, insist on correct installation, and treat ventilation as a core component rather than an afterthought.
Do that, and your next roof won’t just look good the day the crew pulls away. It will still be quiet and steady when the wind kicks up, the snow piles high, or the summer sun bakes the ridge. And that is the point of all this effort: a roof that disappears into the background of your life, doing its job year after year without drama.
Express Roofing Supply
Address: 1790 SW 30th Ave, Hallandale Beach, FL 33009
Phone: (954) 477-7703
Website: https://www.expressroofsupply.com/
FAQ About Roof Repair
How much should it cost to repair a roof? Minor repairs (sealant, a few shingles, small flashing fixes) typically run $150–$600, moderate repairs (leaks, larger flashing/vent issues) are often $400–$1,500, and extensive repairs (structural or widespread damage) can be $1,500–$5,000+; actual pricing varies by material, roof pitch, access, and local labor rates.
How much does it roughly cost to fix a roof? As a rough rule of thumb, plan around $3–$12 per square foot for common repairs, with asphalt generally at the lower end and tile/metal at the higher end; expect trip minimums and emergency fees to increase the total.
What is the most common roof repair? Replacing damaged or missing shingles/tiles and fixing flashing around chimneys, skylights, and vents are the most common repairs, since these areas are frequent sources of leaks.
Can you repair a roof without replacing it? Yes—if the damage is localized and the underlying decking and structure are sound, targeted repairs (patching, flashing replacement, shingle swaps) can restore performance without a full replacement.
Can you repair just a section of a roof? Yes—partial repairs or “sectional” reroofs are common for isolated damage; ensure materials match (age, color, profile) and that transitions are properly flashed to avoid future leaks.
Can a handyman do roof repairs? A handyman can handle small, simple fixes, but for leak diagnosis, flashing work, structural issues, or warranty-covered roofs, it’s safer to hire a licensed roofing contractor for proper materials, safety, and documentation.
Does homeowners insurance cover roof repair? Usually only for sudden, accidental damage (e.g., wind, hail, falling tree limbs) and not for wear-and-tear or neglect; coverage specifics, deductibles, and documentation requirements vary by policy—check your insurer before starting work.
What is the best time of year for roof repair? Dry, mild weather is ideal—often late spring through early fall; in warmer climates, schedule repairs for the dry season and avoid periods with heavy rain, high winds, or freezing temperatures for best adhesion and safety.